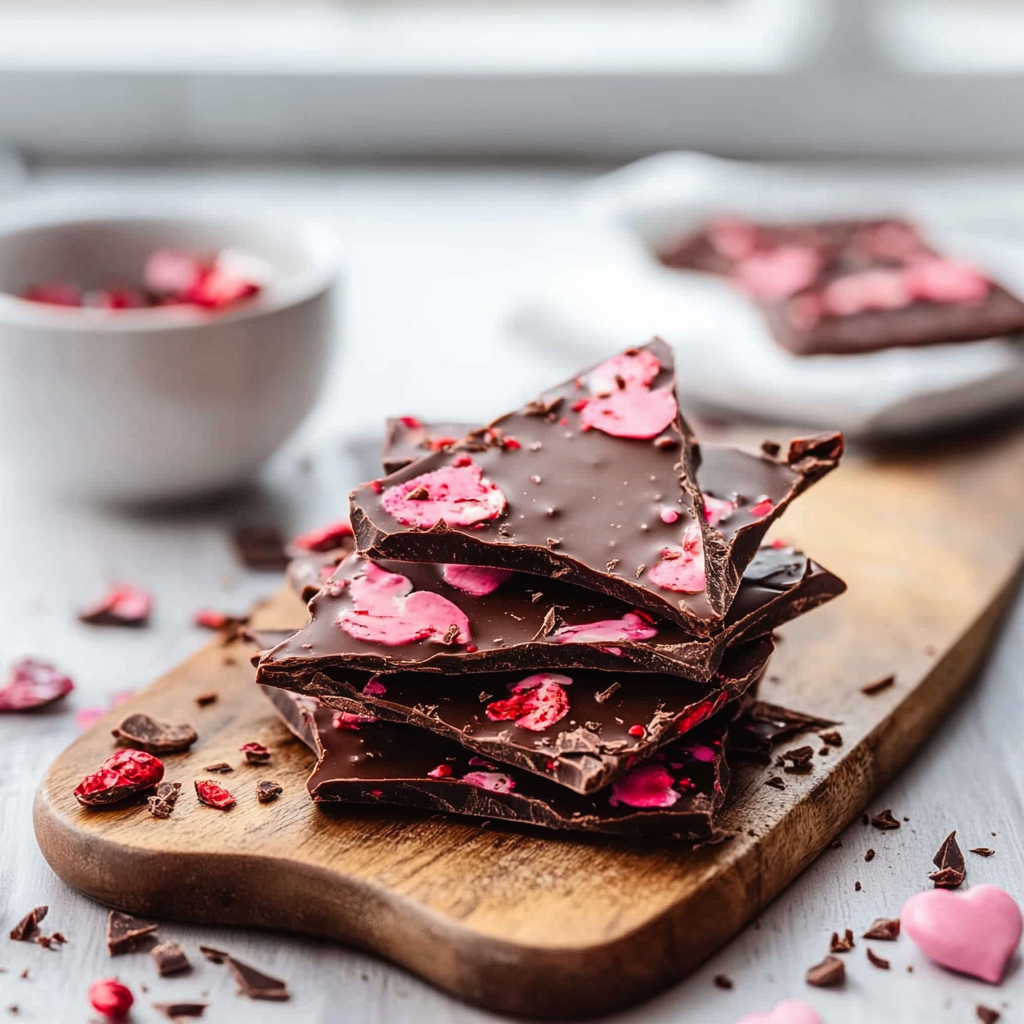
Valentine’s Day is a special occasion that calls for sweet gestures and delightful treats. What better way to celebrate love than with a homemade gift? This Valentine’s Day Chocolate Bark is not only easy to make but also visually stunning and delicious. It combines rich chocolate with an array of colorful toppings, making it an ideal treat for your loved ones or even as a fun project for kids. The best part? You can customize it according to your preferences!
Creating this chocolate bark requires minimal effort but delivers maximum flavor and joy. Whether you are looking to impress a significant other or want to surprise friends, this simple recipe will surely leave everyone wanting more. With just a few key ingredients and some creativity, you can make beautiful pieces that look like they came from a gourmet shop.
Ingredients
When preparing Valentine’s Day Chocolate Bark, using quality ingredients plays a crucial role in achieving the best flavor and texture. Below are the core ingredients you’ll need.
Chocolate
Chocolate is the star of this recipe. You can use either dark, milk, or white chocolate depending on your taste preference. For this recipe, I recommend 12 ounces of high-quality chocolate chips or bars. Melting chocolate can be tricky; ensure you use a microwave-safe bowl or double boiler to avoid burning it.
Toppings
The toppings add both flavor and visual appeal to your chocolate bark. Get creative! You can include nuts, dried fruit, crushed candies, or sprinkles. For example, ½ cup of crushed pretzels adds a salty crunch that pairs beautifully with sweet chocolate. Alternatively, ½ cup of dried strawberries offers a fruity contrast.
Parchment Paper
While not an edible ingredient, parchment paper is essential for lining your baking sheet when making chocolate bark. It prevents sticking and allows for easy removal once the bark has set. Use one large sheet that fits your baking pan comfortably.
Sea Salt (Optional)
For those who enjoy a sweet-and-salty combination, sprinkle a pinch of sea salt over the melted chocolate before adding toppings. This ingredient enhances the flavor profile and adds depth to each bite.

How to Prepare Valentine’s Day Chocolate Bark
Creating your Valentine’s Day Chocolate Bark involves several simple steps that will guide you through the melting process and topping application.
Step 1: Melt the Chocolate
Start by measuring out 12 ounces of your chosen chocolate into a microwave-safe bowl or double boiler. If using a microwave, heat in short bursts of 30 seconds at medium power until melted; stir between intervals until smooth. If using a double boiler, place water in the bottom pot and bring it to simmering heat while stirring frequently until melted.
Be careful not to overheat the chocolate as it can seize up or burn easily. Once fully melted and glossy in texture, remove it from heat immediately.
Step 2: Prepare Your Baking Sheet
Line a baking sheet with parchment paper before pouring in the melted chocolate. Ensure there are no wrinkles in the paper so that the chocolate spreads evenly across its surface. This step helps prevent sticking while allowing for easy removal once set.
Pour the melted chocolate onto the lined baking sheet and use an offset spatula or back of a spoon to spread it evenly into a rectangle or square shape about ¼ inch thick.
Step 3: Add Toppings
Now comes the fun part! While the melted chocolate is still warm and pliable—within about five minutes—scatter your desired toppings across its surface generously.
Feel free to mix textures and colors; aim for visual appeal! Press down gently on each topping so they adhere properly as the bark cools down later.
Step 4: Cool and Set
Once all toppings have been added neatly atop your melted masterpiece—allow it time to cool completely at room temperature or place in the refrigerator for quicker results (about 20-30 minutes). Ensure it solidifies thoroughly before attempting any breaking or cutting.
When set firmly enough without any soft spots remaining—remove from refrigerator if used—and lift off by grasping edges of parchment paper carefully onto cutting board surface next prepared below!
Step 5: Break Into Pieces
Once cooled completely—you’ll want to break up that glorious creation into pieces! Use either hands if preferred (for rustic appeal) or utilize sharp knife/cutting board method which provides cleaner cuts yielding uniform shapes/sizes preferred among gifting occasions such as holidays like Valentine’s day!
Make sure none remain stuck together during process—set aside broken pieces readying them next storage/serving setup options discussed later!
Serving Suggestions
Valentine’s Day Chocolate Bark makes an excellent gift when packaged creatively! Consider placing pieces into decorative boxes tied with ribbons for friends/family members alike! Alternatively serve directly on platters during gatherings—pair alongside fresh fruits such as strawberries/raspberries enhancing overall visual aesthetic while providing complementary flavors too!
For individual servings—consider wrapping smaller portions within clear cellophane bags sealed off nicely adding personalized touch utilizing stickers/cards too ensuring guests feel appreciated upon receiving these special tokens made just for them!

Tips and tricks
To create stunning Valentine’s Day Chocolate Bark, keep these tips in mind. First, consider using a combination of chocolates for depth of flavor. Mixing dark and white chocolate not only adds visual appeal but also provides a delightful contrast in taste.
For added crunch and flavor, incorporate various toppings wisely. Nuts like almonds or pistachios add texture while dried fruits such as cranberries or apricots give sweetness and color. Be sure to chop larger toppings into smaller pieces so they distribute evenly across the surface.
FAQs
What ingredients do I need for Valentine’s Day Chocolate Bark?
To make Valentine’s Day Chocolate Bark, you need just a few essential ingredients: high-quality chocolate (either dark, milk, or white), assorted toppings such as nuts, dried fruits, sprinkles, or candy hearts for decoration. You may also require parchment paper for easy removal after setting and optional flavorings like vanilla or peppermint extract if you’d like an additional twist in taste.
How long does it take to make Valentine’s Day Chocolate Bark?
Making Valentine’s Day Chocolate Bark is relatively quick! The preparation time usually takes about 15-20 minutes to melt the chocolate and arrange toppings before cooling it down properly—typically around 30 minutes in the refrigerator allows it to set completely before cutting into pieces.
Can I store leftover Valentine’s Day Chocolate Bark?
Yes! You can store any leftover Valentine’s Day Chocolate Bark in an airtight container at room temperature for up to two weeks; however, if it’s particularly warm where you live, consider refrigerating it instead for longevity while maintaining its texture and flavor integrity during storage periods.
How do I melt chocolate properly for my bark?
To melt chocolate effectively without burning it involves careful heating techniques—use either a double boiler method by placing chopped pieces over simmering water while stirring continuously until smooth OR microwave-safe bowls heated at short intervals (about 20 seconds each) followed by stirring between sessions until fully melted ensures optimal results without compromising quality!
Can I customize my toppings on Valentine’s Day Chocolate Bark?
Absolutely! The beauty of creating Valentine’s Day Chocolate Bark lies in its versatility—feel free to mix various toppings based on personal preference! Experiment with different combinations like crushed candy bars, pretzels for salty sweetness contrast; just be mindful not too overcrowd them!
Is there a vegan-friendly version of Valentine’s Day Chocolate Bark?
Yes! You can easily create vegan-friendly versions of Valentine’s Day Chocolate Bark by opting for dairy-free chocolates made from plant-based ingredients available at many grocery stores today; consider adding nuts/seeds/dried fruits while ensuring all other components adhere strictly vegetarian guidelines!
